
Host Tools
Host Tools gives event hosts a simple, mobile-friendly way to manage their event on the ground. Share a link with anyone running an event, and they can see who's coming, check people in, and text attendees, all without needing a Solidarity Tech account.
This is especially useful for volunteer hosts, coalition partners, or field leads who need access to RSVP information but shouldn't have full dashboard access.
Co-hosted events: When you co-host an event with another organization, each organization has access to Host Tools for their mirrored event. Host Tools links are unique per organization and session.
Enabling Host Tools
Host Tools can be enabled at the organization level (as a default) or per-event.
Organization Default
To set the default for all new events:
- Go to Settings → Organization
- Find the Host Tools setting
- Toggle it on or off
When enabled at the organization level, all new events will have Host Tools enabled by default. You can still override this on individual events.
Per-Event Setting
To enable or disable Host Tools for a specific event:
- Open the event in the dashboard
- Go to Settings
- Find Enable Host Tools and toggle it on
Getting the Host Tools Link
Once enabled, you can find the Host Tools link in two places:
From the RSVPs Tab
On any event with a single session, you'll see a Host Tools button near the export options. Click it to open the Host Tools page in a new tab.
From the Session Edit Page
When editing an event session (Schedule → click a session), you'll see the Host Tools URL at the bottom of the form. You can:
- Copy the link to share with your host
- Regenerate the link if you need to invalidate the old one (e.g., if it was shared with the wrong person)
Each session has its own unique Host Tools link. For events with multiple sessions, share the correct link for each session.
What Hosts Can Do
The Host Tools page is designed to be simple and focused. Here's what hosts see and can do:
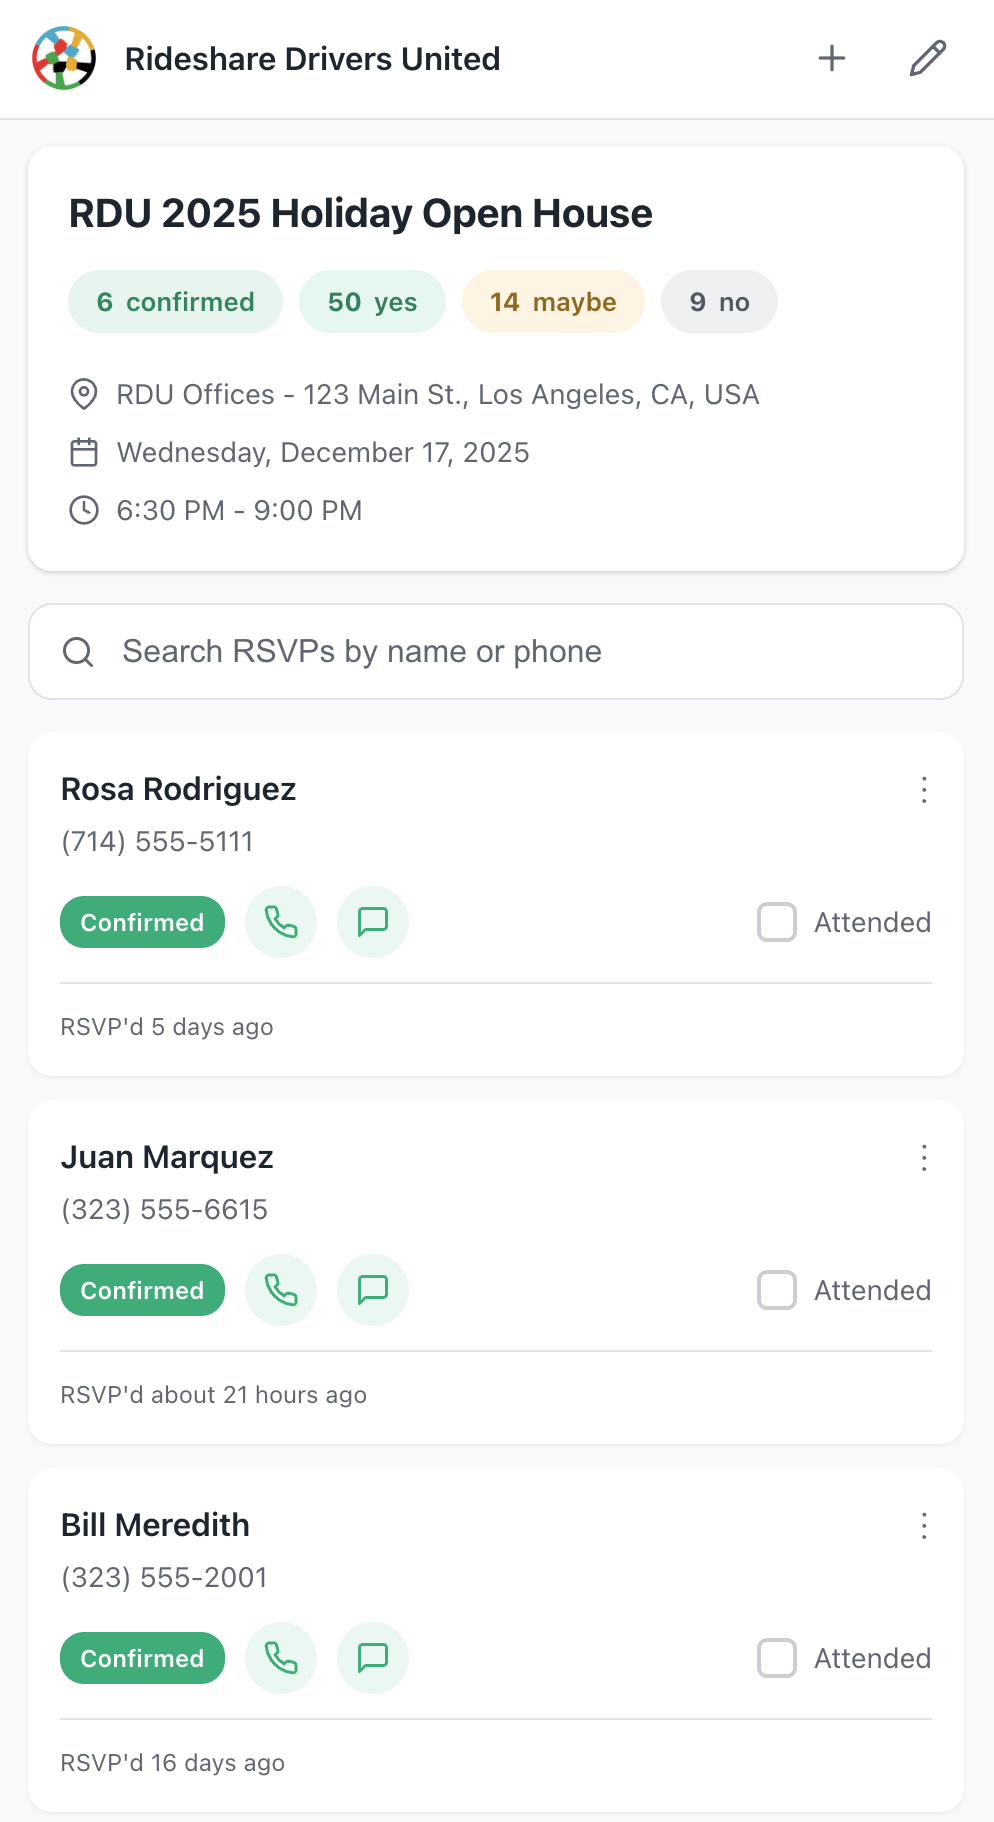
Event Overview
At the top, hosts see:
- Your organization's logo and name
- Event title
- RSVP counts broken down by status (Confirmed, Yes, Maybe, No)
- Event location and time (displayed in the host's local timezone)
RSVP List
All RSVPs appear as cards showing:
- Name and phone number
- RSVP status badge (Confirmed, Yes, Maybe, No)
- When they RSVP'd
Hosts can search by name or phone number to quickly find someone.
Mark Attendance
Each RSVP card has an Attended checkbox. Checking it creates an attendance record -- the same as marking attendance from the dashboard. Hosts can check people in as they arrive.
Contact Attendees
If an RSVP has a phone number, hosts see two icons:
- Phone icon: Opens their phone's dialer
- Message icon: Opens their phone's SMS app with a pre-filled message
Set a Default Message
Hosts can tap the pencil icon in the header to set a default text message. This message pre-fills whenever they tap the message icon on any RSVP.
Use {{ first-name }}} to personalize. The tag gets replaced with each person's first name.
Example:
Hi {{ first-name }}, this is Jeff, the campaign volunteer coorindator. Just checking in to confirm we'll see you at the event tonight?
The default message is saved on the host's device, so it persists even if they close and reopen the page. Each event session has its own saved message.
Mark as Not Coming
Sometimes a host learns someone can't make it. They can tap the three-dot menu (⋮) on any RSVP card and select Mark as not coming. This changes their RSVP status to No and grays out their card.
If someone changes their mind, hosts can use the same menu to Mark as coming.
Add Walk-In Attendees
For people who show up without an RSVP, hosts can tap the + button in the header to add them:
- Enter their full name (required)
- Enter either a phone number or email (at least one required)
- Tap Add & Mark Attended
The person is added to your database and marked as attended. They appear at the bottom of the list with a "Walk-in" badge.
For US phone numbers, the system validates that the number can receive texts. If someone provides a landline, they'll see an error asking for a mobile number.
Link Expiration
Host Tools links remain accessible until one day after the event ends. After that, anyone visiting the link sees a friendly message that the event has ended.
This gives hosts time to finish marking attendance after the event wraps up, while ensuring old links don't stay active indefinitely.
Regenerating a Link
If you need to invalidate a Host Tools link (maybe it was shared too widely), you can regenerate it:
- Go to the session edit page (Schedule → click the session)
- Click Regenerate next to the Host Tools URL
This creates a new link and immediately invalidates the old one. Anyone with the old link will see an error page.
Security Notes
Host Tools links are designed to be shareable but secure:
- Long, random URLs: Links contain an encrypted token that's practically impossible to guess
- Scoped access: Each link only shows RSVPs for that specific event session
- Time-limited: Links stop working one day after the event
- Regeneratable: You can invalidate a link at any time
- No login required: Hosts don't need accounts, reducing password-sharing risks
The tradeoff is that anyone with the link can see RSVP contact information. Only share links with people you trust, and regenerate if needed.
Self Check-in
Self Check-in is a separate, public facing page that lets attendees check themselves in without a host. When Host Tools is enabled, each session gets its own Self Check-in link and QR code.
Getting the Self Check-in Link
From the session edit page (Schedule → click a session), you'll see a Self Check-in section with:
- A copyable link to share with attendees
- A button to open the link in a new tab
- A button to open the QR code in a popup window (great for displaying on a screen or printed sign at your venue)
How It Works
When someone visits the self check-in link, they see a simple form asking for their name, phone number, and email. If they match an existing person in your database, their attendance is recorded. If they're new, they're added as a contact and marked attended automatically.
Tip: Print the QR code or display it on a screen at your event entrance. Attendees scan it with their phone camera, fill in the short form, and they're checked in. No host needed.
Self check-in links follow the same expiration rules as Host Tools: accessible until one day after the event ends.